Workshop

Scrapbook Workshop
Friday July 19th, 2013
6:00 pm.
Stamp and Scrap Studio
email me for address


We will be making this 12x12 two page layout using the Clair Paper Pack
 and the Girls Rock Stamp Set

Cost : $10.00
Must be Pre-paid by Jul 10th to receive a kit
If you can not make it you can purchase a kit to do at home
I can mail it to you for 5.00 more or you can pick it it


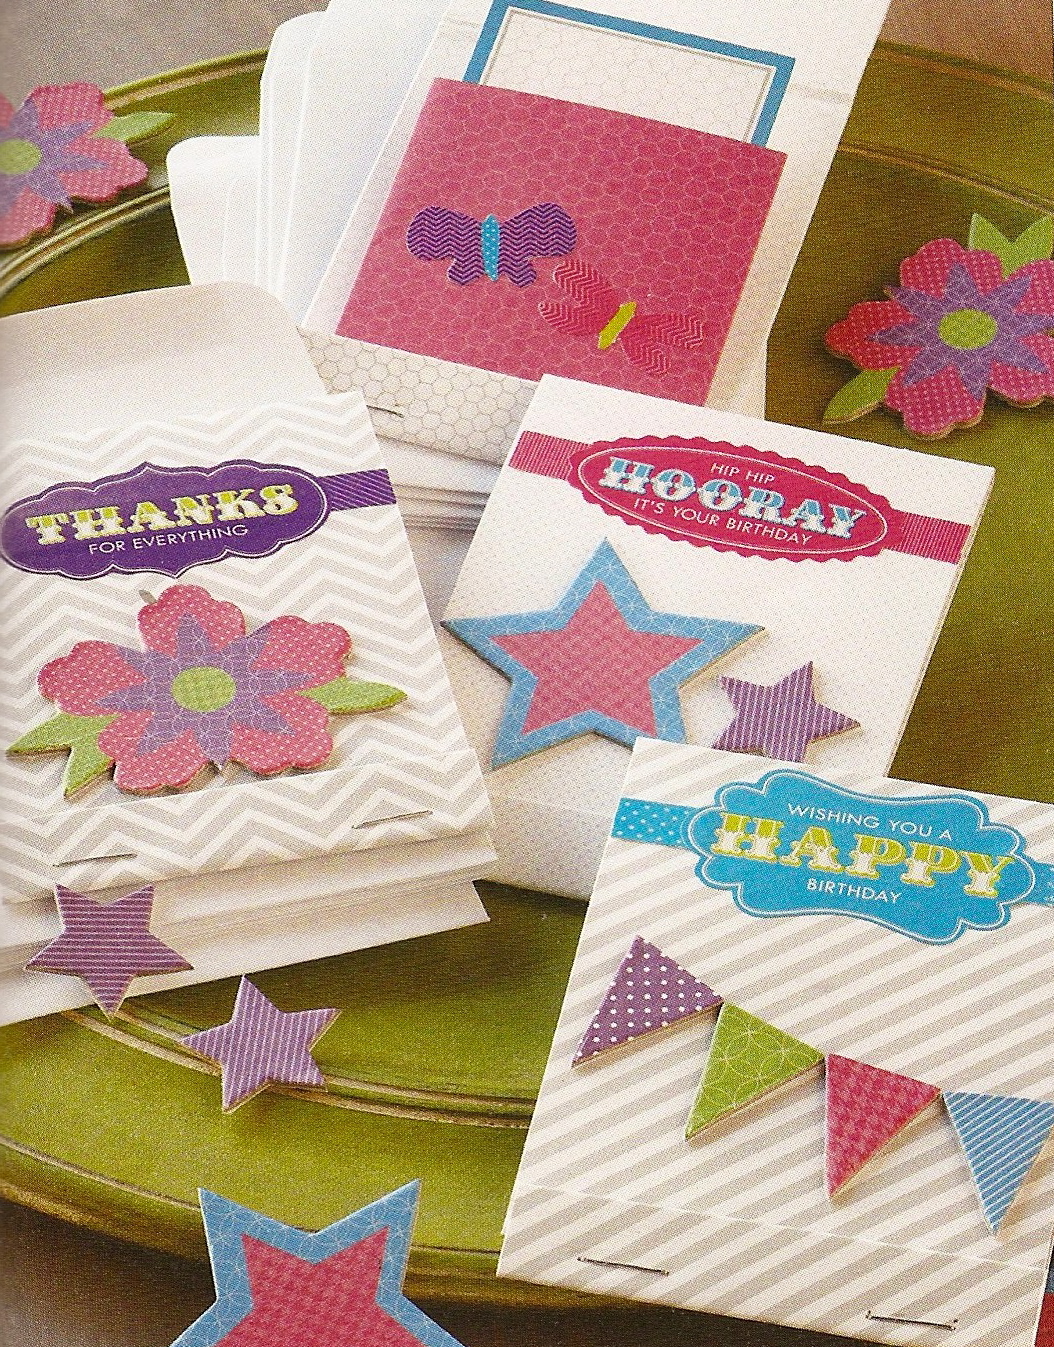
Also the same might I will have the Matchbook Card Class
You will make 12 Cards includes Envelopes, No stamping involved
Great for gift card and money holders
Great for the Beginner
Cost: $20.00
Must also be pre-paid by July 10th to receive a kit
If you can not make it you can still purchase a kit and I can mail 
it for 5.00 more or you can pick it up from me


Hope to see you there!

Graduation Announcement

Made this cute graduation announcement for my cousin.  Used the Cricut Artistie Cartridge for the Hat and the plaque.  Also used the Congrats Graduate Stamp Set A1139, Bigger Brads and some embroidery floss.


Cute Kraft Container

Here is a cute container I made using the My Creations Craft Container, Chantilly Paper Pack, Frame Flair Stamp Set, Happy Thoughts Stamp Set, Trinkets Wooden Shapes, and the Neutral Assortment Bakers Twine.  This was a simple project that will make a great little gift holder, or you can use it for anything you would like.  This was the project on the Big Picture Scrapbooking Pajama Party.


Support the military through the USO!


Support the military through the USO! 
 
 
Get these 3 stamp sets in June or July. For each B-size set, CTMH will donate $3, for each D-size set, they will donate $5. Check out the site for more info and to place your order!

June Special

Make It a Banner Day!

Get a FREE My Creations® Mini Banner!


It’s going to be a “banner” day! When you place a $25 order that includes a stamp set, you’ll receive a My Creations® mini banner for free! The mini banner includes 10 chipboard pennants in 4 different shapes with 9 jump rings for hanging. Use the mini banner as a decoration for your parties and get-togethers this summer. Make it a “banner” day in June!
Shop online or contact me to place your qualifying order and capture the savings today!
*Offer valid June 1–30, 2013. Only orders that include a qualifying stamp set and reach $25 receive a free mini banner.

June Stamp of the Month - A Flowering Bunch

Stamp of the Month

June 2013 A Flowering Bunch

fpo
A Flowering Bunch, set of 10
Recommended Blocks:
2" × 2" (Y1003)
3" × 3" (Y1006)
1" × 6 1/2" (Y1010)

Beautiful Stamps, Amazing Discounts

Each month you can enjoy a new D-size stamp set, available for one month only, for just $5—that’s over 70% off retail! When you place an order of $50 or more in Close To My Heart products, you qualify for this special Stamp of the Month pricing.

June 2013: A Flowering Bunch (S1306A)

Spend $50 and get this Stamp of the Month set for just $5.


Incredibly Cool Crafts

In love with the artwork we created with this stamp set? Get ready to make it yourself! Purchase the materials listed here along with your deeply discounted Stamp of the Month set to get started!
Materials Needed
  1. My Acrylix® A Flowering Bunch
  2. Buzz and Bumble Paper Packet
  3. Enchantment Exclusive Inks® Mini Pigment Pads Set
  4. Whimsy Exclusive Inks® Mini Pigment Pads Set
  5. Durables Artisan Studs
  6. Keyboard Kraft Alphabet
  7. Cricut® Artiste Collection

Required Tools
  1. Colonial White Cardstock
  2. Juniper Cardstock
  3. Kraft Cardstock
  4. Champagne Exclusive Inks® Pad
  5. Cocoa Exclusive Inks® Pad
  6. Autumn Terracotta Exclusive Inks® Marker Set
  7. Crème Brulee Exclusive Inks® Marker Set
  8. Olive Exclusive Inks® Marker Set
  9. Smokey Plum Exclusive Inks® Marker Set
  10. Embroidery Floss Neutral Assortment
  11. Buttons Basic Assortment

6" × 6" Believe Canvas Display


Helpful Hints

To create this artwork, follow the helpful hints outlined below.

  • Cut the following Cricut® Artiste shapes using paper of choice, if desired:
    • 2" Accent 3 <2> (cut 2, p. 32)
    • 3/4" Accent 4 <f> (cut 2, p. 54)
  • If you choose to create the display as shown, follow this order for best results: stamp stems on canvas; attach honeycomb B&T papers; create frame inside B&T papers with embroidery floss; attach flowers and leaves; finish with “Believe” banner and embellishments.

4 1/4" × 5 1/2" Thanks a Bunch Card


Helpful Hints

To create the techniques featured in this artwork, follow the helpful hints outlined below. Then use the Wishes: It's a Wrap™ (altered) pattern found on page 12 of our how-to publication for inspiration.
  • When cutting piece A, change the measurement to 4 1/4" × 4 1/4" instead of 9 1/2" × 4 1/4".
  • To add visual interest, tear a small strip of contrasting cardstock and attach using 3-D foam tape.
  • Embellish with paper accents and accessories, adding dimension with 3-D foam tape as desired.

12" × 12" Uniquely You Page

Helpful Hints

To create the techniques featured in this artwork, follow the helpful hints outlined below. Then use the Reflections: Front & Center—Split Focus™ (altered) pattern from our how-to publication for inspiration.

  • Cut the following Cricut® Artiste shapes using papers of choice, if desired:
    • 2" Accent 3 <2> (p. 32)
    • 3/4" Accent 4 <f> (cut 3, p. 54)
    • 4" Shift+3D Object <K> (cut 2, p. 58)
    • 2 3/4" Accent 2 <MtherDay> (p. 74)
  • Do not cut pieces C, D, or F.
  • To create the leaf border along the top portion of the page, stamp the leaf 9 times on scrap Colonial White paper, making sure to join the leaves end-to-end; trim along top curve of leaves, creating a scallop.
  • Add visual interest by cutting the ends of two strips of paper in multiple chevron designs then attach to page, making sure there is an even space between each cut design.
  • Embellish with stamped accents, paper accents, and accessories, adding dimension with 3-D foam tape as desired.